Cara Mengatasi You can't access this shared folder because your organization's security policies di Windows 11/10
Background:
Microsoft has been progressively increasing the security measures in Windows, and disabling insecure guest logins is one of those steps. Insecure guest logins can pose a significant security risk because they allow access to network shares without requiring a username or password. This change aligns with the security enhancements seen in Windows Enterprise editions.
Your Situation:
After updating to Windows 11 24H2, you found that connecting to network shares without requiring a login (everyone access, password protected sharing turned off) no longer works. Shares with a password and those configured in group policy to allow insecure guest logins function correctly.
Explanation:
Based on the behavior you described, it seems Microsoft is indeed defaulting insecure guest logins to disabled in Windows 11 24H2. This change would enhance security by preventing anonymous access to network shares.
Steps to Address the Issue:
1. Enable Insecure Guest Logins via Group Policy:
- Press **Win + R**, type `gpedit.msc`, and press Enter to open the Group Policy Editor.
- Navigate to **Computer Configuration** > **Administrative Templates** > **Network** > **Lanman Workstation**.
- Double-click **Enable insecure guest logons** and set it to **Enabled**.
- Apply the changes and restart your computer.
2. Enable Insecure Guest Logins via Registry Editor:
- Press **Win + R**, type `regedit`, and press Enter to open the Registry Editor.
- Navigate to `HKEY_LOCAL_MACHINE\SYSTEM\CurrentControlSet\Services\LanmanWorkstation\Parameters`.

- If the `AllowInsecureGuestAuth` entry does not exist, right-click and select **New** > **DWORD (32-bit) Value**, and name it `AllowInsecureGuestAuth`.
- Set the value of `AllowInsecureGuestAuth` to `1`.
- Close the Registry Editor and restart your computer.
3. Consider Alternative Security Measures:
- Instead of enabling insecure guest logins, consider setting up password-protected sharing for better security.
- Ensure that all users have appropriate permissions to access the necessary shares.
source https://answers.microsoft.com/en-us/windowsclient/forum/all/windows-11-24h2-and-insecure-guest-logins-settings/20502d71-4324-44a3-8ec2-40d8b778a523
Cara Crawl / Index Site ke Google
Kunjungi alamat https://search.google.com/search-console
Klik Menu dibawah ini lalu pilih add properties


Jika sudah klik verify jika berhasil lanjut ke step selanjutnya
Isikan alamatnya seperti gambar di bawah ini

jika sudah tunggu proses maka muncul page di bawah ini

setelah itu Klik Request Indexing
MySQL Pelajari Penting
- Limit ... Offset...
- Group_Concat
- Self Join (https://www.educba.com/mysql-self-join/)
-
MySQL LAST_INSERT_ID() how it works at multi-users environment
Untuk mengambil data id yang terakhir di insertkan bisa memakai fungsi berikut
LAST_INSERT_ID()
LAST_INSERT_ID() gives you the last autogenerated id on the connection you execute it on, it does not return the last insert id globally produced by the MySQL server.
sauce : https://stackoverflow.com/questions/5835677/last-insert-id-how-it-works-at-multi-users-environment
Displaying URL parameter values as text in an element on webpage
source https://stackoverflow.com/questions/71727647/displaying-url-parameter-values-as-text-in-an-element-on-webpage-question-from
<!-- example url https://exampleurl.com/?birthdate=22091977&pdflink=yourlink123.pdf-->
<html>
<body>
<span id="birthdate"></span>
</br>
<span id="pdflink"></span>
</body>
</html>
<script>
const queryString = window.location.search;
const urlParams = new URLSearchParams(queryString);
const birthdate = urlParams.get('birthdate');
const pdflink = urlParams.get('pdflink');
document.getElementById("birthdate").innerHTML = birthdate;
document.getElementById("pdflink").innerHTML = pdflink;
</script>
MySQL Stored Procedure : Insert Data in Header and Detail within 1 Transaction
This is Generated by ChatGPT 2023-11-01
To insert data into a single-row header table and multiple-row detail table using a stored procedure in MySQL, you can follow these steps. In this example, we'll create two tables: header and detail, with a one-to-many relationship, and then create a stored procedure to insert data into both tables.
Assuming you have the following tables:
CREATE TABLE header (
header_id INT AUTO_INCREMENT PRIMARY KEY,
header_data VARCHAR(255)
);
CREATE TABLE detail (
detail_id INT AUTO_INCREMENT PRIMARY KEY,
header_id INT,
detail_data VARCHAR(255),
FOREIGN KEY (header_id) REFERENCES header(header_id)
);
Here's a stored procedure to insert data into both tables:
DELIMITER $$
CREATE PROCEDURE InsertHeaderAndDetails(
IN headerData VARCHAR(255),
IN detailDataArray JSON
)
BEGIN
DECLARE done INT DEFAULT FALSE;
DECLARE detailValue VARCHAR(255);
DECLARE cur CURSOR FOR SELECT value FROM JSON_TABLE(detailDataArray, '$[*]' COLUMNS(value VARCHAR(255) PATH '$'));
-- Insert data into the header table
INSERT INTO header (header_data) VALUES (headerData);
SET @lastHeaderID = LAST_INSERT_ID(); -- Get the last inserted header ID
-- Insert data into the detail table
OPEN cur;
read_loop: LOOP
FETCH cur INTO detailValue;
IF done THEN
LEAVE read_loop;
END IF;
INSERT INTO detail (header_id, detail_data) VALUES (@lastHeaderID, detailValue);
END LOOP;
CLOSE cur;
END $$
DELIMITER ;
This stored procedure takes two parameters:
headerData: The data to be inserted into the header table.
detailDataArray: A JSON array containing the data to be inserted into the detail table.
You can call the stored procedure like this:
CALL InsertHeaderAndDetails('Header Data', '["Detail 1", "Detail 2", "Detail 3"]');
Radmin VPN Alternative
ZeroTier
Freelan
Hamachi
sc https://www.saashub.com/zerotier-one-alternatives https://www.saashub.com/radmin-vpn-alternatives
Log USB insert / Eject Using USBLogView by nirsoft
USBLogView is a small utility that runs in the background and records the details of any USB device that is plugged or unplugged into your system. For every log line created by USBLogView, the following information is displayed: Event Type (Plug/Unplug), Event Time, Device Name, Description, Device Type, Drive Letter (For storage devices), Serial Number (Only for some types of devices), Vendor ID, Product ID, Vendor Name, Product Name, and more...
You can easily select one or more log records and then export them into csv/tab-delimited/xml/html file.
To Download Click This link
http://www.nirsoft.net/utils/usb_log_view.html
or This Direct Link
Visual Studio Code - Removing Lines Containing criteria
This method dont need any Extension
1. Ctrl+F to open find.
2. Paste your string.
3. Alt+Enter to select all of the instances of the string on the page.
4. Ctrl+L to broaden the selection to the entire line of each instance on the page.
5. Delete/Backspace to remove those lines.
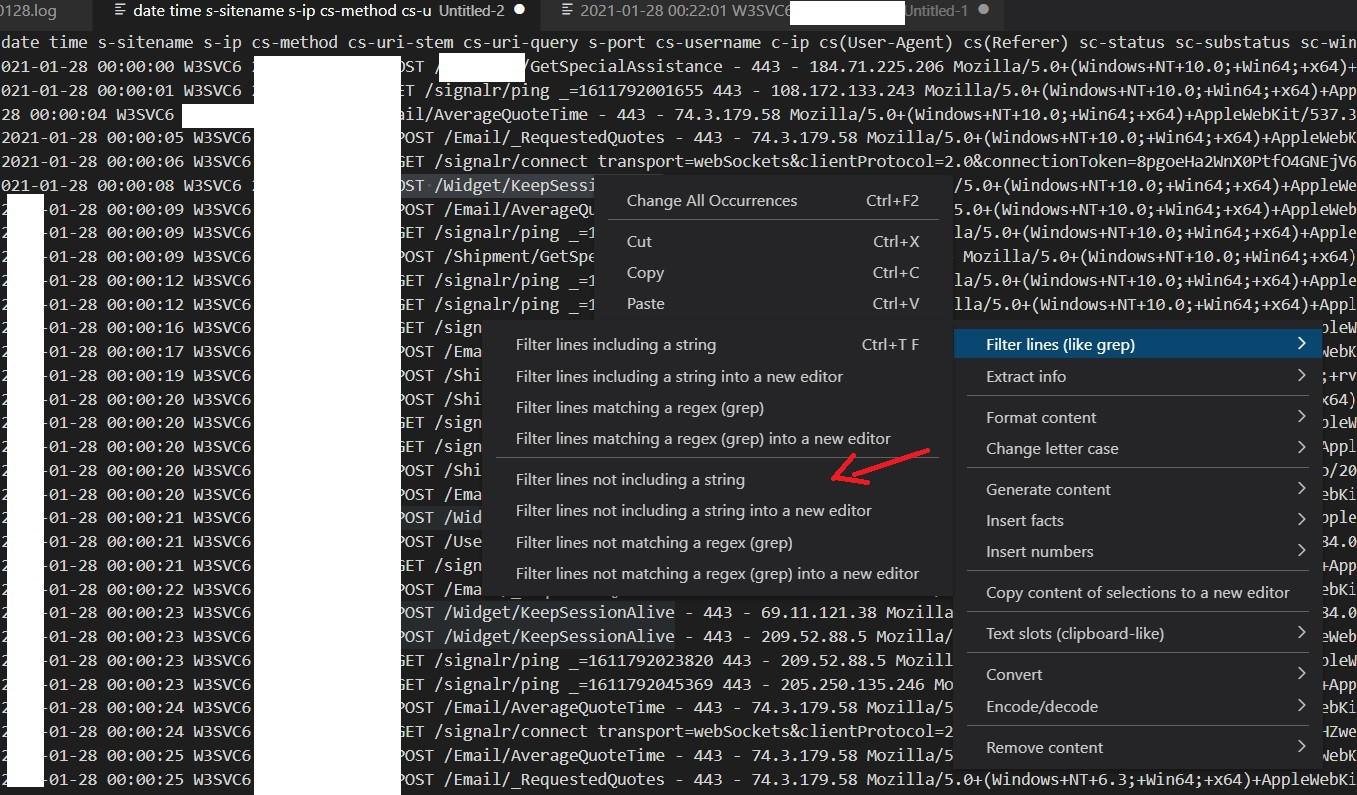
This method u need this extension https://marketplace.visualstudio.com/items?itemName=qcz.text-power-tools
[Fix Error] Kode Error 0x0000011b Windows 10 Sharing Printer
Kode error 0x0000011b muncul saat ingin melakukan sharing printer pada windows 10. Error tersebut disebabkan oleh update terbaru windows 10 2021-09 Cumulative Update for Windows 10 Version 21H1 for x64-based Systems (KB5005565).
Cara mengatasi problem tersebut yaitu :
Buka Windows Registry Editor (regedit)
Kemudian arahkan ke HKEY_LOCAL_MACHINE\SYSTEM\CurrentControlSet\Control\Print
Kemudian buat DWORD-32 baru dengan nama RpcAuthnLevelPrivacyEnabled set Value Data : 0
Selanjutnya Restart PC / Laptop
Error 0x0000011b akan hilang dan sharing printer bisa digunakan kembali.
source : https://pdsi.unisayogya.ac.id/fix-error-kode-error-0x0000011b-windows-10-sharing-printer/
PowerShell merubah nama file extensi tertentu dengan tambahan tanggal dalam 1 folder
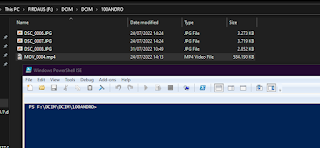
Get-ChildItem |Foreach-Object { Rename-Item $_ -NewName ("{0}-{1}{2}" -f $_.LastWriteTime.ToString('yyyyMMdd'),$_.BaseName,$_.Extension) }

jika ingin nama file tetap di depan anda bisa menggunakan script dibawah ini
Get-ChildItem |Foreach-Object { Rename-Item $_ -NewName ("{0}-{1}{2}" -f $_.BaseName,$_.LastWriteTime.ToString('yyyyMMdd'),$_.Extension) }
Menghapus File Ukuran Besar pada Git History
 |
| Git filter branch |
Fungsi git filter-branch
Cara menggunakannya adalah sebagai berikut
git filter-branch --force --index-filter \
'git rm --cached --ignore-unmatch lokasi/ke/file.exe' \
--prune-empty --tag-name-filter cat -- --all
Jika sudah dijalankan maka akan muncul gambar seperti di atas
file.exe adalah file yang ingin di hapus dari semua history github repo yang telah disimpan, cara ini dapat menghemat banyak sekali space pada local repo sehingga ukuran repo tidak membengkak.
setelah proses selesai maka eksekusi command di bawah ini
git push origin --force --all
 |
| Git Push Force |
jika git menemukan file lain yang ukurannya besar maka akan diberikan peringatan tetang file tersebut
 |
| Git Bash Info |
git gc --aggressive --prune
 |
| Git gc agressive prune |
Merubah Partisi dari MBR ke GPT atau sebaliknya


