https://github.com/abbodi1406/vcredist/releases/tag/v0.103.0
Untuk Cetak di Printer Draft Agar bisa Langsung Cetak ke Printer (Epson) atau RAW Print
Link bisa dipakai disini
http://download4.epson.biz/sec_pubs/pos/reference_en/escpos/index.html
Untuk Cetak di Printer Epson Dot Matrix dan Agar Bisa Autocut Menggunakan Bahasa Pemrograman Apapun
Bisa Memakai 2 Cara ini
printData += '<crlf><crlf><crlf><crlf><crlf><char29>V0';
printData += '\r\n\r\n\r\n\x1D\x56\x01';
Untuk Python Bisa Coba di Bawah ini : Original Source Code (https://github.com/python-escpos/python-escpos/issues/129)
This comment is not directly related to Issue #18:
I am describing a possible extension, which I intend to resubmit later as a new
issue.
Here is an experiment, for people who have a combination thermal & slip
printer. The paper type can be selected:
HW_PRINT_ROLL = '\x1B\x63\x30\x03' # 80mm roll, thermal
HW_PRINT_SLIP = '\x1B\x63\x30\x04' # Slip / Cheque, dot matrix
Common settings, like the type face and character geometry, can be set on the
dot matrix slip printer, the same way as done for the thermal engine.
E.paper('slip')
E.set('left','A','B',1,2)
If anyone tests this, please be mindful of both the logical and physical length
of your slip. My printer seems not to sense the end of a narrow slip. It is
okay with an A4 sheet.
PAPER_SLIP_OUT = '\x1B\x4B\xC0' # Eject slip or cheque
The method I use to eject is a slip-reverse command. It reverses the feed
direction on a flat paper path TM-H5000II, and feeds a slip out forward on the
TM-H6000.
E.cut('slip')
Always return to the roll paper type when finished.
E.paper('roll')
% hg diff
diff -r 849dabb63ce0 escpos/constants.py
--- a/escpos/constants.py Thu May 30 08:56:33 2013 -0700
+++ b/escpos/constants.py Sat Jan 18 15:14:30 2014 +1100
@@ -10,16 +10,21 @@
HW_INIT = '\x1b\x40' # Clear data in buffer and reset modes
HW_SELECT = '\x1b\x3d\x01' # Printer select
HW_RESET = '\x1b\x3f\x0a\x00' # Reset printer hardware
+# Printer paper
+HW_PRINT_ROLL = '\x1B\x63\x30\x03' # 80mm roll, thermal
+HW_PRINT_SLIP = '\x1B\x63\x30\x04' # Slip / Cheque, dot matrix
# Cash Drawer
CD_KICK_2 = '\x1b\x70\x00' # Sends a pulse to pin 2 []
CD_KICK_5 = '\x1b\x70\x01' # Sends a pulse to pin 5 []
# Paper
PAPER_FULL_CUT = '\x1d\x56\x00' # Full cut paper
PAPER_PART_CUT = '\x1d\x56\x01' # Partial cut paper
+PAPER_SLIP_OUT = '\x1B\x4B\xC0' # Eject slip or cheque
# Text format
TXT_NORMAL = '\x1b\x21\x00' # Normal text
TXT_2HEIGHT = '\x1b\x21\x10' # Double height text
TXT_2WIDTH = '\x1b\x21\x20' # Double width text
+TXT_4SQUARE = '\x1b\x21\x30' # Quad area text
TXT_UNDERL_OFF = '\x1b\x2d\x00' # Underline font OFF
TXT_UNDERL_ON = '\x1b\x2d\x01' # Underline font 1-dot ON
TXT_UNDERL2_ON = '\x1b\x2d\x02' # Underline font 2-dot ON
diff -r 849dabb63ce0 escpos/escpos.py
--- a/escpos/escpos.py Thu May 30 08:56:33 2013 -0700
+++ b/escpos/escpos.py Sat Jan 18 15:14:30 2014 +1100
@@ -189,8 +189,8 @@
self._raw(TXT_NORMAL)
self._raw(TXT_2HEIGHT)
elif height == 2 and width == 2:
- self._raw(TXT_2WIDTH)
- self._raw(TXT_2HEIGHT)
+ self._raw(TXT_NORMAL)
+ self._raw(TXT_4SQUARE)
else: # DEFAULT SIZE: NORMAL
self._raw(TXT_NORMAL)
# Type
@@ -203,7 +203,6 @@
elif type.upper() == "U2":
self._raw(TXT_BOLD_OFF)
self._raw(TXT_UNDERL2_ON)
- self._raw(TXT_ITALIC_OFF)
elif type.upper() == "BU":
self._raw(TXT_BOLD_ON)
self._raw(TXT_UNDERL_ON)
@@ -227,6 +226,15 @@
self._raw(TXT_ALIGN_LT)
+ def paper(self, type='ROLL'):
+ if type.upper() == '':
+ self._raw(HW_PRINT_ROLL)
+ elif type.upper() == 'ROLL':
+ self._raw(HW_PRINT_ROLL)
+ elif type.upper() == 'SLIP':
+ self._raw(HW_PRINT_SLIP)
+
+
def cut(self, mode=''):
""" Cut paper """
# Fix the size between last line and cut
@@ -234,6 +242,10 @@
self._raw("\n\n\n\n\n\n")
if mode.upper() == "PART":
self._raw(PAPER_PART_CUT)
+ if mode.upper() == "FULL":
+ self._raw(PAPER_FULL_CUT)
+ if mode.upper() == "PART":
+ self._raw(PAPER_SLIP_OUT)
else: # DEFAULT MODE: FULL CUT
self._raw(PAPER_FULL_CUT)
Redis
Redis (Remote Dictionary Server) is a fast database used for in-memory caching to reduce server load by reducing disk and/or network read and write operations.
Uses of Redis are:
Caching frequently accessed data to improve access time.
Session storage for web applications
Real-time analytics and leader boards.
Managing queues or task lists in background job systems.
How Redis Work?
Redis acts as a caching layer between the database and the client to speed up data access and reduce the load on the main database. When a client asks for data, the API Gateway forwards the request to Redis.
 |
| Working of Redis |
If Redis has the data (cache hit), it returns it quickly through the API Gateway to the client. If the data is missing (cache miss), Redis retrieves it from the database, stores it in the cache for future requests, and then passes it back through the API Gateway to the client. This flow speeds up response times and reduces the database load.
Source : https://www.geeksforgeeks.org/system-design/introduction-to-redis-server/

FastReport get the current paper size from the printer and use it for the report
FastReport
can be configured to get the current paper size from the printer and use it for
the report. However, it requires some manual steps in your Delphi code to
correctly read the printer's settings and then apply them to the FastReport
report object.
Here's a
breakdown of how it works and a Delphi script to accomplish this.
Understanding the Process
- FastReport's Default Behavior: By default, FastReport uses
the TfrxReportPage.PaperSize property to determine the page
dimensions. This is often set to a standard size like DMPAPER_A4 at design time.
- Getting Printer Information: The key is to use the Windows
API and the Delphi Printers unit to access the TPrinter object. This object holds all
the configuration for the currently selected printer, including its DM_PAPERSIZE, DM_PAPERWIDTH, and DM_PAPERLENGTH properties.
- Applying to FastReport: Once you have the custom
dimensions, you can programmatically set the TfrxReportPage.PaperWidth and TfrxReportPage.PaperHeight properties. It's important to
set the PaperSize property to DMPAPER_USER (which has a value of 256) to signal that you are using
custom dimensions.
Delphi Script to Dynamically Set Paper Size
This script
demonstrates a function that can be called before a report is prepared or
printed. It gets the current printer's paper size and applies it to a
FastReport page.
http://googleusercontent.com/immersive_entry_chip/0
unit frxUtils;
interface
uses
Windows, Messages, SysUtils, Classes, frxClass, Printers, frxPrinters,
frxCustomDB,
frxDSys, frxDesign, frxGDIplus;
// This procedure gets the current
printer's paper dimensions and applies them
// to the specified FastReport page.
procedure SetReportPaperSizeFromPrinter(aReport:
TfrxReport);
implementation
procedure
SetReportPaperSizeFromPrinter(aReport: TfrxReport);
var
Device, Driver, Port: array[0..255] of Char;
hDeviceMode: THandle;
pDeviceMode: PDeviceMode;
frxPage: TfrxReportPage;
PaperWidth, PaperHeight: Integer;
begin
//
Ensure the printer is initialized and there is a report to work with
if
(aReport = nil) or (aReport.Pages[0] = nil) then
Exit;
//
Get the current printer's device mode information
Printer.GetPrinter(Device, Driver, Port, hDeviceMode);
pDeviceMode := GlobalLock(hDeviceMode);
try
// Check if the DeviceMode is valid
if (pDeviceMode <> nil) and (pDeviceMode.dmSize >=
SizeOf(TDeviceMode)) then
begin
// Read the paper dimensions from the device mode.
// dmPaperWidth and dmPaperLength are in 0.1mm units.
PaperWidth := pDeviceMode.dmPaperWidth;
PaperHeight := pDeviceMode.dmPaperLength;
// Find the first report page
frxPage := aReport.Pages[0] as TfrxReportPage;
// Apply the custom paper size to the FastReport page
// It's crucial to set PaperSize to DMPAPER_USER to enable custom
dimensions
frxPage.PaperSize := DMPAPER_USER;
// FastReport's PaperWidth and PaperHeight properties are in
millimeters.
// So, we divide the DM values (in 0.1mm) by 10.
frxPage.PaperWidth := PaperWidth / 10;
frxPage.PaperHeight := PaperHeight / 10;
end;
finally
// Unlock and free the handle
if hDeviceMode <> 0 then
begin
GlobalUnlock(hDeviceMode);
GlobalFree(hDeviceMode);
end;
end;
end;
end.
### How to Use the Script
1.
**Save the Unit:** Save the code above as `frxUtils.pas` and add it to
your project.
2.
**Call the Procedure:** Before showing the report preview or printing,
call the `SetReportPaperSizeFromPrinter` procedure. This ensures the report is
sized correctly for the currently selected printer.
Here's an example of how you might call it
from a button click event:
```delphi
procedure TForm1.Button1Click(Sender:
TObject);
begin
//
Set the printer before preparing the report
//
This is an optional step if you want to use a specific printer instead of the
default
frxReport1.SelectPrinter;
//
Get the printer's custom size and apply it to the report page
SetReportPaperSizeFromPrinter(frxReport1);
//
Prepare and show the report
frxReport1.ShowPreparedReport;
end;


Untuk Cetak di Printer Epson Dot Matrix dan Agar Ukurannya bisa 1/4 Letter atau 1/2 Letter Menggunakan Bahasa Pemrograman Apapun
Gunakan fungsi page break di fast-report atau gunakan Character khusus untuk mengirim command ke printer seperti #12 untuk page break
Code Snippet : CommandString = 'Hello, this is a test page!' + #10#12;
Specifically, the #12 character constant is the control character for a Form Feed, which is the command that an Epson dot-matrix printer like the LX-310 understands as a page break. The #10 character is a Line Feed, which moves the print head to the next line.
Contoh Untuk Delphi memakai di bawah ini untuk Cetak Draft
procedure PrintMe(Content: TStringList);
var
sPrinter, sDriver, sPort, sTitle: array[0..255] of Char;
hPrinter, hDevMode: THandle;
DocInfo1: TDocInfo1;
W: DWORD;
S: String;
C: Char;
I: Integer;
begin
// page-break
C := #12;
// initialize the document structure
with DocInfo1 do begin
pDocName := StrPCopy(sTitle, 'Your Title Here');
pOutputFile := nil;
pDatatype := 'RAW';
end;
// get the current printer (sPrinter)
Printer.GetPrinter(sPrinter, sDriver, sPort, hDevMode);
// open the printer
OpenPrinter(sPrinter, hPrinter, nil);
try
try
// start document to spooler
StartDocPrinter(hPrinter, 1, @DocInfo1);
StartPagePrinter(hPrinter);
// send the 'Source' to the printer
for I := 0 to Source.Count - 1 do begin
S := Source.Strings;
if not WritePrinter(hPrinter, PChar(S), Length(S), W) then
Break;
end;
// send a page-break to the printer (optional)
if not WritePrinter(hPrinter, @C, 1, W) then
Break;
// end the page
EndPagePrinter(hPrinter);
// end the document
EndDocPrinter(hPrinter);
finally
// close the printer
ClosePrinter(hPrinter);
end;
except
// abort the job
AbortPrinter(hPrinter);
raise;
end;
end;
https://www.tek-tips.com/threads/printing-text-on-dotmatrix-printer.921897/
Setting Printer Epson Dot Matrix Agar Urutannya Sesuai Meskipun Dokumen Sangat Banyak
Pilih opsi Start printing after last page is spooler. lalu save, seharusnya cetakan akan sesuai urutan

Berlaku untuk LX-300, LX-310, LQ-310, LQ-2180, LQ-2190 dan kawan kawannya
Best FTP and File Sharing Apps Windows - Total Commander

Total Commander
https://www.ghisler.com/download.htm
Mematikan Windows 10/11 Dengan Registry Tanpa Tool
Copy Script dibawah ini lalu save as reg dan jalankan lalu akan pause sampai 2033, atau bisa di ganti sendiri ke tahun kapanpun
Windows Registry Editor Version 5.00
[HKEY_LOCAL_MACHINE\SOFTWARE\Microsoft\WindowsUpdate\UpdatePolicy\Settings]
"PausedFeatureStatus"=dword:00000000
"PausedQualityStatus"=dword:00000000
[HKEY_LOCAL_MACHINE\SOFTWARE\Microsoft\WindowsUpdate\UX\Settings]
"FlightSettingsMaxPauseDays"=dword:00000e42
"PauseFeatureUpdatesStartTime"="2023-11-06T14:03:37Z"
"PauseFeatureUpdatesEndTime"="2033-10-31T14:03:37Z"
"PauseQualityUpdatesStartTime"="2023-11-06T14:03:37Z"
"PauseQualityUpdatesEndTime"="2033-10-31T14:03:37Z"
"PauseUpdatesStartTime"="2023-11-06T14:03:37Z"
"PauseUpdatesExpiryTime"="2033-10-31T14:03:37Z"
 |
| Windows 10 |
| Windows 11 |
Mematikan Windows Update 10/11 Kill Services (Hard Block) - Menunda Windows Update untuk Windows 10/11 (Soft Block)
Tool ini untuk menunda update sampai ke tanggal tertentu (soft block), atau bisa untuk hard block update Jalankan saja tool dibawah ini
https://greatis.com/stopupdates10/
atau bisa pakai WUB jika memang benar2 mau kill tasknya (tapi biasanya ini ngefek ke aplikasi yang butuh update)
link Windows Update Blocker sordum.org/downloads/?st-windows-update-blocker
Membuat Windows Menjadi Lebih Cepat Dengan Sekali Klik (NTLite)
Langsung saja download toolnya dan jalankan https://www.ntlite.com/download/
ada tool lain juga seperti https://msmgtoolkit.in/
ada tool lain seperti https://github.com/LeDragoX/Win-Debloat-Tools
berfungsi menghilangkan bloatware dan sejenisnya
Install Windows 11 Tanpa Login Microsoft Account (Windows 11 24H2 Builds 26120 dan lebih baru)

Windows 11 Versi 24H2 mewajibkan untuk login ke Microsft Account, ini jadi menyusahkan para teknisi, ada 2 cara untuk bypass loginnnya
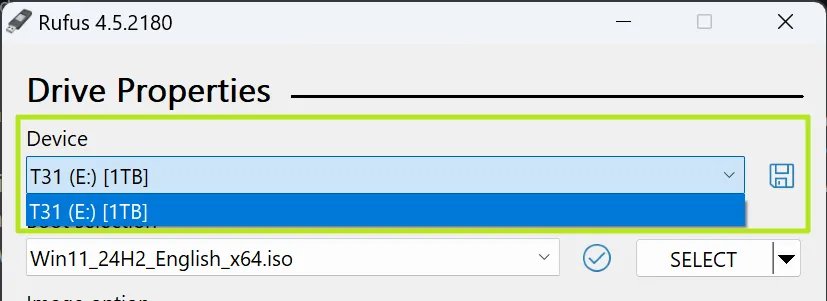
Gunakan RUFUS v4.4 atau lebih baru lalu jalankan seperti biasa, pilih usb drive yang mau dijadikan installer
Pilih ISO yang akan dijadikan installer


Lalu proses install seperti biasa
Jalankan sampai proses CHOOSE A COUNTRY di bawah ini, JANGAN KLIK YES, tekan tombol keyboard SHIFT + F10

lalu tutup command prompt dan pilih I don't have Internet
Pilih Continue With Limited Setup seperti dibawah

Lanjutkan biasa dan Selesai.
Cara kedua install seperti biasa lalu jika sudah sampai CHOOSE A COUNTRY seperti dibawah ini tekan SHIFT+F10
muncul command prompt ketikkan OOBE\BYPASSNRO
muncul command prompt ketikkan OOBE\BYPASSNRO
lalu komputer akan restart dan kembali ke layar ini.
jika OOBE\BYPASSNRO muncul eror "command not found", skip saja maka lanjutkan step selanjutnya.

tekan SHIFT+F10 lagi lalu ketik ipconfig /release

Close command prompt dan lanjut ke step selanjutnya pilih region, keyboard, dll seperti biasa
Close command prompt dan lanjut ke step selanjutnya pilih region, keyboard, dll seperti biasa

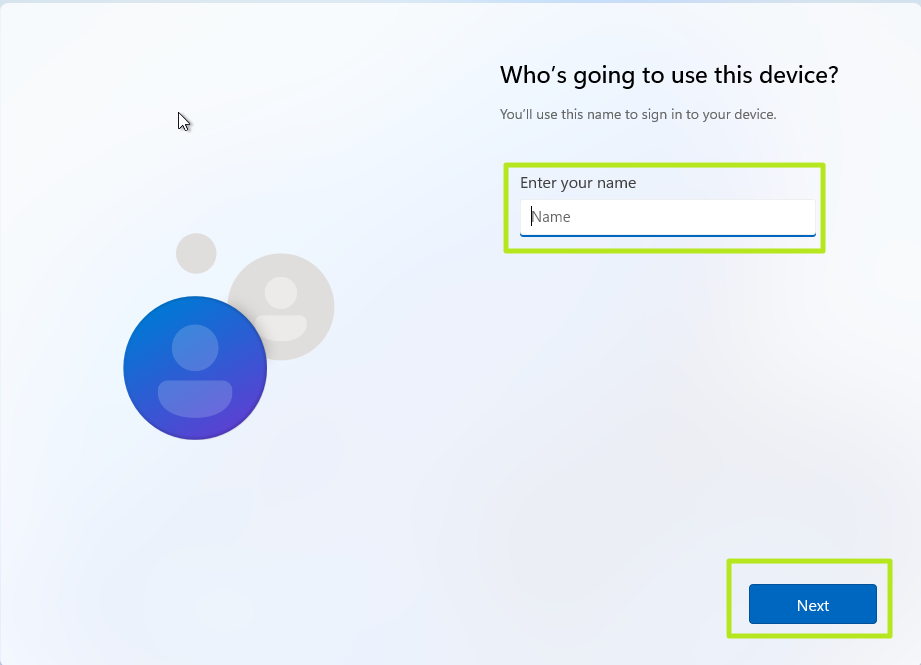
lalu sampai muncul kotak dialog dibawah ini pilih I don't have Internet


Lalu akan masuk ke window seperti dibawah maka langkahnya berhasil, tinggal di isi seperti biasa dan selesai

Jika perlu membuat windows 11 ringan anda bisa memakai tools ntlite.com/download/
Jika masih tidak bisa silahkan komen dibawah, saya akan berikan solusi yang lain.
Stored Procedure to Insert or Update Header and Details Table in MySQL
If you need to handle multiple detail records for a single header record in your stored procedure, you can modify the procedure to accept a JSON array of detail records. This way, you can pass multiple details in a single call to the stored procedure.
### Updated Stored Procedure
Here’s how you can create a stored procedure that accepts multiple detail records in JSON format:
#### Table Structure Example
Assuming the same table structure as before:
```sql
CREATE TABLE header_table (
id INT AUTO_INCREMENT PRIMARY KEY,
header_info VARCHAR(255),
created_at TIMESTAMP DEFAULT CURRENT_TIMESTAMP
);
CREATE TABLE detail_table (
id INT AUTO_INCREMENT PRIMARY KEY,
header_id INT,
detail_info VARCHAR(255),
created_at TIMESTAMP DEFAULT CURRENT_TIMESTAMP,
FOREIGN KEY (header_id) REFERENCES header_table(id)
);
```
#### Stored Procedure
Here’s the updated stored procedure:
```sql
DELIMITER //
CREATE PROCEDURE SaveOrUpdateHeaderDetail(
IN p_header_id INT,
IN p_header_info VARCHAR(255),
IN p_details JSON
)
BEGIN
DECLARE v_header_exists INT;
-- Check if the header exists
SELECT COUNT(*) INTO v_header_exists
FROM header_table
WHERE id = p_header_id;
-- If header exists, update it
IF v_header_exists > 0 THEN
UPDATE header_table
SET header_info = p_header_info,
created_at = NOW()
WHERE id = p_header_id;
-- If header does not exist, insert a new header
ELSE
INSERT INTO header_table (header_info)
VALUES (p_header_info);
-- Get the last inserted header ID
SET p_header_id = LAST_INSERT_ID();
END IF;
-- Clear existing details for the header
DELETE FROM detail_table WHERE header_id = p_header_id;
-- Insert new details from JSON
INSERT INTO detail_table (header_id, detail_info)
SELECT p_header_id, detail_info
FROM JSON_TABLE(p_details, '$[*]' COLUMNS (detail_info VARCHAR(255) PATH '$')) AS jt;
END //
DELIMITER ;
```
### Explanation
1. **Parameters**:
- `p_header_id`: The ID of the header to update or `NULL` for a new header.
- `p_header_info`: The information for the header.
- `p_details`: A JSON array containing detail records.
2. **Check for Header Existence**: The procedure checks if the header exists.
3. **Update or Insert Header**: If the header exists, it updates the header information; if not, it inserts a new header and retrieves the new `header_id`.
4. **Clear Existing Details**: Before inserting new details, it deletes any existing details associated with the `header_id`. This ensures that you only keep the latest details.
5. **Insert New Details**: It uses `JSON_TABLE` to extract detail information from the JSON array and insert it into the `detail_table`.
### Usage
You can call this stored procedure like this:
```sql
CALL SaveOrUpdateHeaderDetail(
NULL,
'New Header Info',
'["Detail 1", "Detail 2", "Detail 3"]'
);
```
Or to update an existing header with new details:
```sql
CALL SaveOrUpdateHeaderDetail(
1,
'Updated Header Info',
'["Updated Detail 1", "Updated Detail 2", "Updated Detail 3"]'
);
```
### Note
- Ensure that your MySQL version supports JSON functions (MySQL 5.7 and later).
- Adjust the data types and lengths according to your actual table definitions.
- If you want to keep existing details and just add new ones, you can modify the logic accordingly.
______________________________________________________________________
To create a stored procedure in MySQL that can save or update data in both a header table and a detail table, we first need to define the structure of the tables. Below is an example of how to create the tables, the stored procedure, and how to call it from PHP using PDO.
### Step 1: Create the Tables
```sql
CREATE TABLE header (
id INT AUTO_INCREMENT PRIMARY KEY,
header_info VARCHAR(255),
header_info2 VARCHAR(255),
created_at DATETIME DEFAULT CURRENT_TIMESTAMP,
created_by VARCHAR(255),
modified_at DATETIME DEFAULT CURRENT_TIMESTAMP ON UPDATE CURRENT_TIMESTAMP,
modified_by VARCHAR(255)
);
CREATE TABLE detail (
id INT AUTO_INCREMENT PRIMARY KEY,
header_id INT,
detail_info VARCHAR(255),
detail_info2 VARCHAR(255),
detail_info3 VARCHAR(255),
detail_info4 VARCHAR(255),
created_at DATETIME DEFAULT CURRENT_TIMESTAMP,
modified_at DATETIME DEFAULT CURRENT_TIMESTAMP ON UPDATE CURRENT_TIMESTAMP,
FOREIGN KEY (header_id) REFERENCES header(id) ON DELETE CASCADE
);
```
### Step 2: Create the Stored Procedure
```sql
DELIMITER //
CREATE PROCEDURE SaveOrUpdateHeaderAndDetails(
IN p_id INT,
IN p_header_info VARCHAR(255),
IN p_header_info2 VARCHAR(255),
IN p_created_by VARCHAR(255),
IN p_modified_by VARCHAR(255),
IN p_details JSON
)
BEGIN
DECLARE v_header_id INT;
-- Check if the header exists
IF p_id IS NULL THEN
-- Insert new header
INSERT INTO header (header_info, header_info2, created_by, modified_by)
VALUES (p_header_info, p_header_info2, p_created_by, p_modified_by);
SET v_header_id = LAST_INSERT_ID();
ELSE
-- Update existing header
UPDATE header
SET header_info = p_header_info,
header_info2 = p_header_info2,
modified_by = p_modified_by
WHERE id = p_id;
SET v_header_id = p_id;
END IF;
-- Clear existing details for the header
DELETE FROM detail WHERE header_id = v_header_id;
-- Insert new details
SET @json = p_details;
INSERT INTO detail (header_id, detail_info, detail_info2, detail_info3, detail_info4)
SELECT v_header_id, detail_info, detail_info2, detail_info3, detail_info4
FROM JSON_TABLE(@json, '$[*]'
COLUMNS (
detail_info VARCHAR(255) PATH '$.detail_info',
detail_info2 VARCHAR(255) PATH '$.detail_info2',
detail_info3 VARCHAR(255) PATH '$.detail_info3',
detail_info4 VARCHAR(255) PATH '$.detail_info4'
)
) AS details;
END //
DELIMITER ;
```
### Step 3: Example of Calling the Stored Procedure
You can call the stored procedure using the following SQL command:
```sql
CALL SaveOrUpdateHeaderAndDetails(
NULL, -- For new header, use NULL
'Header Info 1',
'Header Info 2',
'User 1',
'User 1',
'[{"detail_info": "Detail 1", "detail_info2": "Detail 2", "detail_info3": "Detail 3", "detail_info4": "Detail 4"}, {"detail_info": "Detail 5", "detail_info2": "Detail 6", "detail_info3": "Detail 7", "detail_info4": "Detail 8"}]'
);
```
### Step 4: PHP Example Using PDO
Certainly! Below is a complete PHP example that demonstrates how to use PDO to call the stored procedure we created earlier. This example includes error handling and assumes you have already set up your MySQL database and tables as described.
### PHP Example to Call the Stored Procedure
```php
<?php
// Database connection parameters
$host = 'localhost'; // Change if necessary
$db = 'your_database'; // Replace with your database name
$user = 'your_username'; // Replace with your database username
$pass = 'your_password'; // Replace with your database password
$charset = 'utf8mb4';
// Set up the Data Source Name (DSN)
$dsn = "mysql:host=$host;dbname=$db;charset=$charset";
$options = [
PDO::ATTR_ERRMODE => PDO::ERRMODE_EXCEPTION,
PDO::ATTR_DEFAULT_FETCH_MODE => PDO::FETCH_ASSOC,
PDO::ATTR_EMULATE_PREPARES => false,
];
try {
// Create a new PDO instance
$pdo = new PDO($dsn, $user, $pass, $options);
// Prepare the JSON data for details
$details = json_encode([
['detail_info' => 'Detail 1', 'detail_info2' => 'Detail 2', 'detail_info3' => 'Detail 3', 'detail_info4' => 'Detail 4'],
['detail_info' => 'Detail 5', 'detail_info2' => 'Detail 6', 'detail_info3' => 'Detail 7', 'detail_info4' => 'Detail 8']
]);
// Prepare the stored procedure call
$stmt = $pdo->prepare("CALL SaveOrUpdateHeaderAndDetails(?, ?, ?, ?, ?, ?)");
// Bind parameters
$headerId = null; // Use null for a new header, or provide an existing ID to update
$headerInfo = 'Header Info 1';
$headerInfo2 = 'Header Info 2';
$createdBy = 'User 1';
$modifiedBy = 'User 1';
// Execute the stored procedure
$stmt->execute([$headerId, $headerInfo, $headerInfo2, $createdBy, $modifiedBy, $details]);
echo "Header and details saved/updated successfully.";
} catch (PDOException $e) {
// Handle any errors
echo "Error: " . $e->getMessage();
}
?>
```
### Explanation of the Code
1. **Database Connection**: The script starts by defining the database connection parameters and creating a new PDO instance to connect to the MySQL database.
2. **JSON Data Preparation**: The details for the detail table are prepared as a JSON string. This is necessary because the stored procedure expects a JSON input for the details.
3. **Stored Procedure Call**: The script prepares a statement to call the stored procedure `SaveOrUpdateHeaderAndDetails`. It binds the parameters, including the header ID (which is `null` for a new header), header information, created and modified by fields, and the JSON string for details.
4. **Execution**: The stored procedure is executed with the provided parameters. If successful, a success message is displayed.
5. **Error Handling**: If there is an error during the execution, it is caught and displayed.
### Usage
- Make sure to replace the database connection parameters (`$host`, `$db`, `$user`, `$pass`) with your actual database credentials.
- You can change the `$headerId` variable to an existing header ID if you want to update an existing record instead of creating a new one.
- Save this script as a `.php` file and run it on a server with PHP and MySQL support.
This example should give you a good starting point for using stored procedures with PDO in PHP.
link to gist
https://gist.github.com/ifirdausku/503dec090b2edf54b859f61890ac3d34
https://gist.github.com/ifirdausku/964fc9c105e382496fc570e6bae77785
blackbox ai with my prompt, (try it first)
Cara Mengatasi You can't access this shared folder because your organization's security policies di Windows 11/10
Background:
Microsoft has been progressively increasing the security measures in Windows, and disabling insecure guest logins is one of those steps. Insecure guest logins can pose a significant security risk because they allow access to network shares without requiring a username or password. This change aligns with the security enhancements seen in Windows Enterprise editions.
Your Situation:
After updating to Windows 11 24H2, you found that connecting to network shares without requiring a login (everyone access, password protected sharing turned off) no longer works. Shares with a password and those configured in group policy to allow insecure guest logins function correctly.
Explanation:
Based on the behavior you described, it seems Microsoft is indeed defaulting insecure guest logins to disabled in Windows 11 24H2. This change would enhance security by preventing anonymous access to network shares.
Steps to Address the Issue:
1. Enable Insecure Guest Logins via Group Policy:
- Press **Win + R**, type `gpedit.msc`, and press Enter to open the Group Policy Editor.
- Navigate to **Computer Configuration** > **Administrative Templates** > **Network** > **Lanman Workstation**.
- Double-click **Enable insecure guest logons** and set it to **Enabled**.
- Apply the changes and restart your computer.
2. Enable Insecure Guest Logins via Registry Editor:
- Press **Win + R**, type `regedit`, and press Enter to open the Registry Editor.
- Navigate to `HKEY_LOCAL_MACHINE\SYSTEM\CurrentControlSet\Services\LanmanWorkstation\Parameters`.

- If the `AllowInsecureGuestAuth` entry does not exist, right-click and select **New** > **DWORD (32-bit) Value**, and name it `AllowInsecureGuestAuth`.
- Set the value of `AllowInsecureGuestAuth` to `1`.
- Close the Registry Editor and restart your computer.
3. Consider Alternative Security Measures:
- Instead of enabling insecure guest logins, consider setting up password-protected sharing for better security.
- Ensure that all users have appropriate permissions to access the necessary shares.
source https://answers.microsoft.com/en-us/windowsclient/forum/all/windows-11-24h2-and-insecure-guest-logins-settings/20502d71-4324-44a3-8ec2-40d8b778a523
Langganan:
Postingan
(
Atom
)

